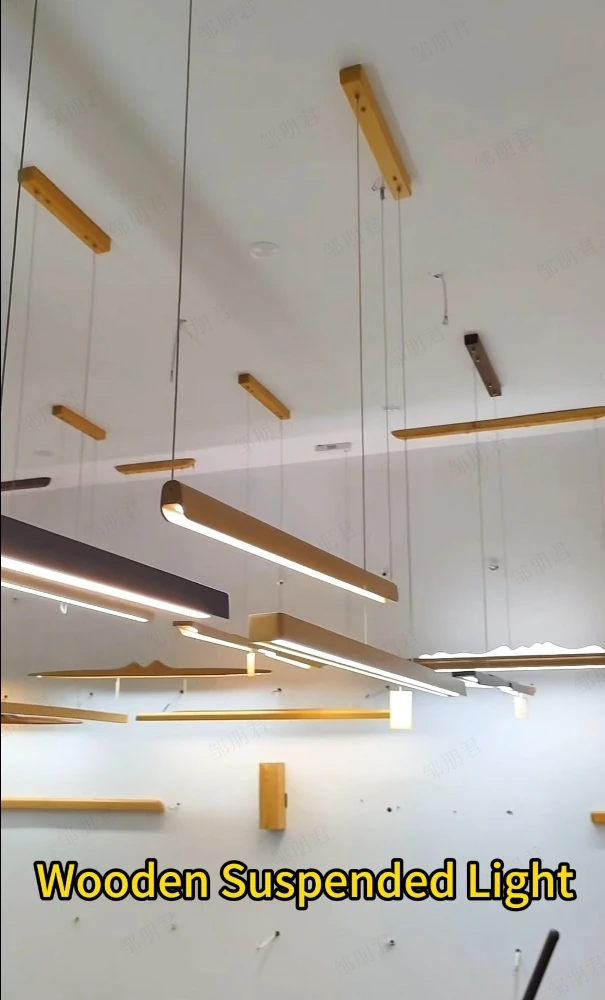
Crafting a Stylish Wooden One-Line Strip Light: A Step-by-Step Guide
Are you looking to add a touch of elegance and modernity to your home decor? Creating a stylish wooden one-line strip light is a fantastic DIY project that combines the warmth of wood with the functionality of contemporary lighting. Follow this detailed guide to make your own beautiful wooden one-line strip light, perfect for illuminating any space.
Step 1: Choosing the Right Wood
The foundation of any woodworking project is the wood itself. For a wooden one-line strip light, you’ll want to select high-quality wood that is both durable and visually appealing. Hardwoods like oak, walnut, or maple are excellent choices due to their density and beautiful grain patterns. These woods are not only strong but also add a touch of sophistication to your finished piece.
When selecting your wood, look for pieces that are free from knots, cracks, and warping. A straight grain is ideal, as it ensures a clean and even finish. Additionally, consider the thickness and width of the wood. A thickness of at least 1 inch (2.54 cm) is recommended to provide enough support for the light strip and other components.
Step 2: Flattening the Wood Surface
A perfectly flat surface is essential for a professional finish. To achieve this, you can use a thickness planer or other tools like a hand plane. If your wood is uneven, start by using a thickness planer to remove small amounts of wood at a time. Always plane with the grain to avoid tear-out and ensure a smooth surface.
For minor imperfections, a hand plane can be used to fine-tune the surface. After planing, use a straight edge or a long level to check for flatness. Any gaps indicate areas that need further planing. Take your time with this step, as a flat surface will make the rest of the process much easier.
Step 3: Squaring the Edges
Straight and even edges are crucial for a polished look. To square the edges of your wood, use a jointer to plane one edge until it is perfectly straight. Then, use a combination square to ensure that the edge is at a 90-degree angle to the flat surface. Repeat this process for all four sides of the wood, ensuring that each edge is straight and even.
Step 4: Creating Grooves for the Light Strip
Precise grooves are necessary to house the light strip securely. Begin by measuring and marking the center of the wood where the groove will be placed. Use a pencil and a straight edge to draw a clear line. Next, use a router with a straight bit to cut the groove. Set the depth of the cut to match the thickness of the light strip. After cutting the groove, sand it to remove any rough edges and ensure a snug fit for the light strip.
Step 5: Sanding the Surface
Smoothness is key to achieving a professional finish. Start by sanding the wood with a coarse grit sandpaper (80-100 grit) to remove any planer marks or imperfections. Gradually move to finer grits (120, 180, 220) to achieve a smooth surface. Don’t forget to sand all four sides of the wood, paying special attention to the groove. Finish with a fine grit sandpaper (320 grit) for the smoothest possible finish. Wipe the wood clean with a damp cloth to remove any dust before proceeding.
Step 6: Painting the Wood
A well-applied paint job can enhance the beauty of your wooden strip light. Begin by applying a coat of primer to seal the wood and provide a base for the paint. Allow the primer to dry completely before moving on. Next, use a high-quality paint suitable for wood and apply four thin coats, allowing each coat to dry before applying the next. Lightly sand with fine grit sandpaper between coats to remove any imperfections and ensure a smooth finish. This process will give your wooden strip light a professional and even appearance.
Step 7: Assembling the Lighting
With the wood prepared, it’s time to install the light strip and other components. Carefully place the LED strip into the groove, ensuring it fits snugly. Follow the manufacturer’s instructions to connect the light strip to a power source, using a power adapter suitable for the LED strip. If desired, add decorative end caps to the wood to cover the edges and give a finished look.
Step 8: Completing the Fixture
To ensure your wooden one-line strip light is ready to illuminate your space, make sure all components are securely attached. Use wood glue or small screws to hold the light strip in place. Test the light strip by turning on the power to ensure it illuminates evenly and there are no issues. Once everything is working correctly, attach the wooden light fixture to the ceiling or wall using appropriate hardware.
Bonus Feature: Versatile Color Options
For added versatility, consider using a color-changing LED strip. These strips often come with remote controls or Bluetooth connectivity, allowing you to change the color of the light to suit any mood or occasion. Simply follow the same installation steps, but connect the light strip to a compatible controller instead of a regular power adapter.
Conclusion
Creating a stylish wooden one-line strip light is a rewarding DIY project that combines woodworking skills with modern lighting solutions. By carefully selecting the right wood, flattening and squaring the surface, creating precise grooves, and applying a professional finish, you can create a beautiful and functional lighting fixture for your home. Whether you choose a classic design or opt for the versatility of color-changing lights, this project is sure to add a touch of elegance to any space. Happy crafting!
